Hello Everyone!
This is part Two in a four part Post Series about Becoming a Better Quilter. Fine tuning our quilting skills make us better quilters; our finished projects will be better constructed and look nicer. For me that’s important- I take pride in what I’ve made and want the best quilt possible for myself, a gift for someone, or something to sell through Lisa Helen Quilts.
So let’s dive in to today’s subject- sewing an accurate ¼” seam allowance. There’s one key word in the last sentence- I’m sure you can guess what it is. That one 8 letter word may be the hardest thing you will ever master in your quilting life. (Remember my comment in the first post- all my words are from experience). The accurate ¼” seam allowance is like an illusive little burglar, lurking around, making you chase him and when you think you’re about to capture him- he’s gone. Yes, it takes ongoing practice, monitoring, checking, and conscience self-reminding to sew an accurate ¼” seam allowance. Luckily, I have some thoughts to share and tools to help. So many of us struggle with this and there is hope to achieve an accurate, consistent ¼” seam allowance. I’ve gotten to know my shifty burglar- he sits beside me most of the time but still eludes me at times. I can never let me guard down.
For a long time I was sewing a slightly Inaccurate ¼” seam allowance and I didn’t even realize it. I had gotten a gated style ¼” presser foot and thought I was all set. Lesson- even though you have a ¼” presser foot don’t assume you are using it correctly!
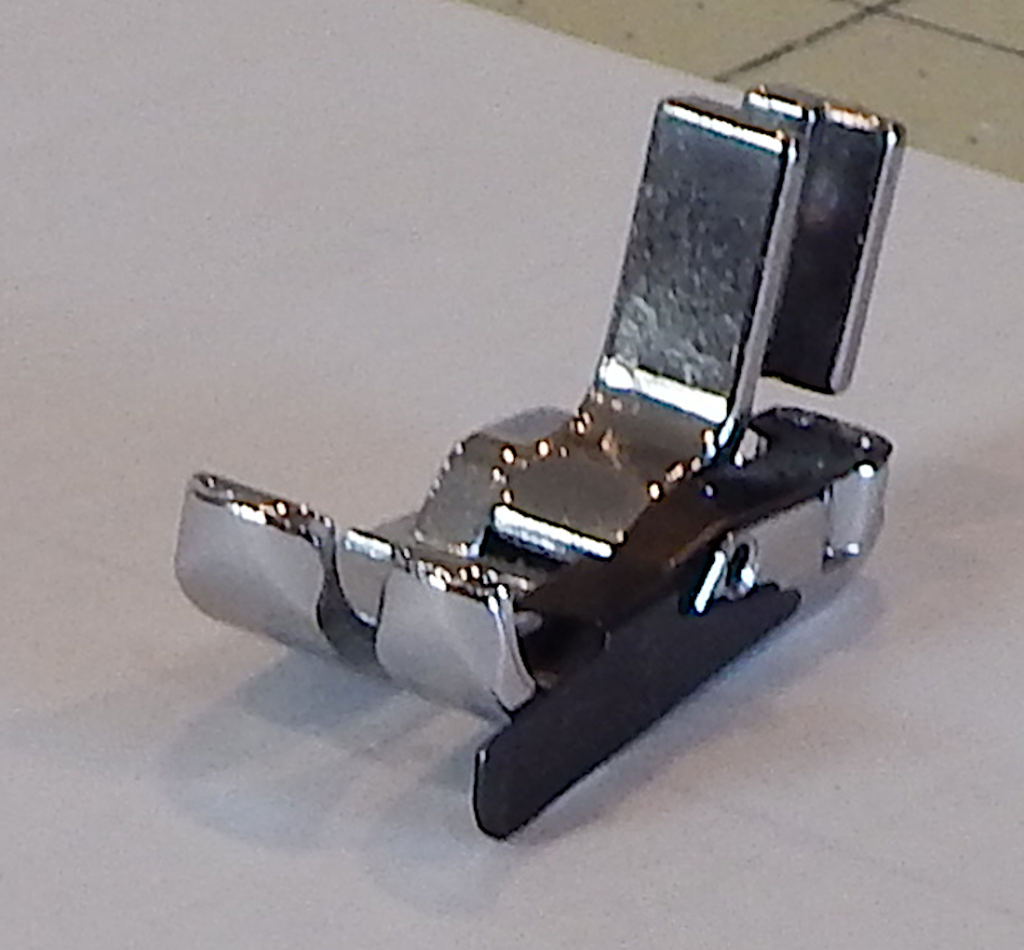
The two ¼” presser feet pictured above are common styles. The foot on the left is the gated style. It has a piece of vertically placed metal on its right side- called a gate. The fabric gently rides along its inside edge. The gate should be ¼” from the needle creating the perfect seam allowance as you sew.
The foot pictured on the right marks various seam allowances by its shape. This foot is uniquely shaped and each edge is a measured width. The vertical edges are 1/8″, 1/4″ and 3/8″, Each of the horizontal notches is also a measured mark. They mark 1/8″ and 1/4″ in front of and behind the needle position.
The first presser foot I tried was the gated style foot. I put it on a Singer. I liked the way it worked; I tested the accuracy of the seam allowance and all was good. So I sewed away for a long time. I know we shouldn’t sew over pins, but it is a must when you have to gather bulk into a seam. From occasionally, slowly, carefully, sewing over the tips of pins, that knocked that exact seam allowance out of whack. My point of telling you this is, the gated style of presser foot is temperamental. You must be careful and test its accuracy regularly. By the way, I gave the gate a gentle squeeze and that helped. Then I learned the “spot” where the fabric had to be (a little bit left of the gate) to achieve a better seam allowance.
I tried the presser foot pictured on the right. I currently use this foot on my Brother XR3140. For an inexpensive machine this Brother has been a very good performer; there’s a link at the end of this post for a similar machine. I have come to love this style foot! All the marks and measured edges are perfect even when I sew half-square triangle diagonal lines and corners for the binding work. I achieve a very accurate seam allowance with this foot. If you want to explore the world of presser feet there’s a link at the end of this post.
I want to pause to make an important side note. I have found that on my basic sewing machines finding a presser foot to match the shank style of your machine will work just fine. If you have a more expensive machine (Pfaff, Bernina, Janome, etc) please refer to your manual or machine dealer/store to get your presser feet. Their feet are engineered to perform on their machines. I have a Pfaff Passport that has nice features for quilters including a micro adjustment for the needle position. I have a Pfaff ¼” presser foot for it. I also bought a single-hole sole plate- if you have frustration with the fabric pushing down into the sole plate on your first stitch (sometimes happens when you start sewing at a piece that’s a point) look at that type of soleplate. Also, another important advantage- a lot of higher-end sewing machines have a micro adjustment feature for the needle. This means the needle can be moved side to side in very small increments, that small adjustment might be the perfect solution to a slightly wide or narrow seam allowance. My Pfaff Passport has this feature.
Another little tool that I have several of (at each sewing station and in my toolbox for classes) is a guide to check your seam allowance. It’s called a Sewing Machine Seam Guide. A picture of it is below. I also found this Guide at my local quilt store- Windy Moon.
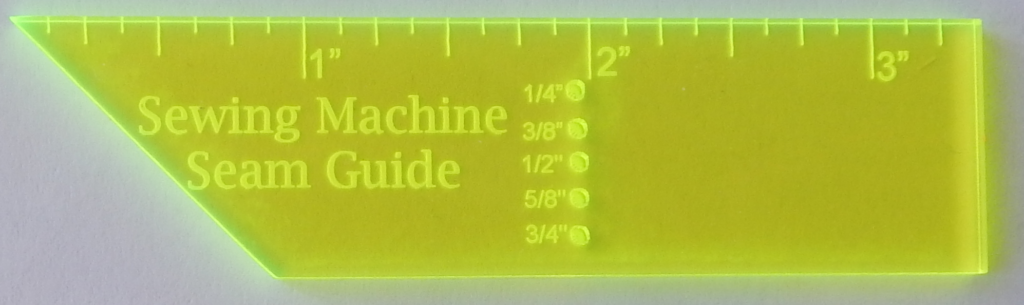
I absolutely love this little guy! I use it to remind myself of my perfect “seam allowance sweet spot” on my machine. The tiny holes are to put your needle through and see where the edge of the guide lays- that is where the edge of your fabric will ride. Each hole in the guide is a different width- ¼” up to ¾”. The ruler is 1” wide. You can also use the guide to check a seam already sewn. Lay the ruler on top the seam so you can see your stitching in the hole. If the edge of the fabric sits at the edge of the ruler your seam allowance is accurate.
So now let’s talk about another important term “scant”. We see this a lot- sew a “scant ¼” seam”. This means, sew a little narrower than ¼”. When you sew a seam and press it the thread and the fold of fabric forming the press take up a little room. If we sew a “scant” seam we’ve allowed for the tiny bit the thread and press take up. As we sew pieces together if our seam allowance is too wide or too narrow that will change the overall size of each block and the size of the quilt. Our project instructions usually mention to check the size of your pieces or trim pieces to a certain dimension. Doing these checks help you ensure your pieces are accurate- and that you are sewing an accurate seam. When I sew half square triangles and flying geese pieces I usually sew a scant seam. Then I can trim away slight excess to achieve a finished piece with perfect points and corners. It’s easier to join those pieces into beautiful blocks. So with all this said, sewing an accurate seam starts with the math aspect, continues with possible adjustments and ends with accurate sized block pieces and finished blocks.
Here is a way to test if you are sewing an accurate ¼” seam allowance. Accurately cut three pieces of fabric- all 6” x 1 1/2”. Sew the long edge of the strips together- at “your” ¼” seam allowance. Press the seams to one side- a nice “tight” press. Measure the width of the three strips- place your ruler over the top and look at the three sections. Your piece should measure 3 ½” wide; the center section should be 1” wide and the outside sections should each be 1 ¼” wide. If your piece is too wide then your seam allowance is too narrow. If your piece is too narrow then your seam allowance is too wide. Cut more strips and repeat the seam allowance test. You can adjust by moving your fabric slightly as it feeds under the presser foot, or move your needle (if it has micro adjustment capability). Test until you have achieved an accurate ¼” seam allowance.
As always, if you have comments or questions please shoot me an email- from our contact page or comment below. I’m happy to hear from you!
Until next week’s post for the blog series- find some time to sew!
*****************************************************************************************************
This is a similar machine to my Brother. Brother CS-6000i 60 Stitch Computerized Free Arm Sewing Machine
Find presser feet related to this post for your machine here
Lisa Helen,
Good article. Thanks for all the info!
Susan