Hello Everyone!
This is part three in a four part Post Series about Becoming a Better Quilter. Fine tuning our quilting skills make us better quilters; our finished projects will be better constructed and look nicer.
My first post talked about thread for piecing. My second post talked about an accurate ¼” seam allowance. Today I’d like to chat about pressing.
Pressing our seams correctly is an important step. I happen to enjoy ironing so as I learned to quilt I took time and care to do a good job at pressing. I must mention, through my experience as an instructor, many quilters neglect the importance of this step. I hope the remainder of my post drives home the importance of pressing.
THREE STEPS, PLEASE. It all starts with an iron that has lots of hot and lots of steam. That is not step one.
Let’s define the word -press- just in case- so we’re all on the same page. When we iron a shirt for example, we glide the iron over the sections of fabric; the iron is doing a lot of moving around. When we iron our block pieces we press. Moving the iron makes our pieces stretch- a bad thing. We move the iron around as little as possible to avoid stretching. Pressing technique is up and down without a lot of movement. That is not step one either.
STEP ONE. SET THE SEAM. I believe this is such an important step. This first hot, steamy heat sets the seam; it closes the holes the needle made in the fabric and it tightens up the thread. The first press also warms up the fibers to prepare for the next step. (This is the step my students seem to neglect). That is step one! Again, a very important step!
STEP TWO. Finger press. When I learned to quilt this was not a taught step. This is a step I feel is important in the pressing ritual and a good way to avoid stretch in your piece. It’s like a “pre-press” to step three and you use your fingers or a nifty little tool I’ll mention shortly.
Note your pattern instruction for pressing. After you set the seam make an initial press with your fingertips. When you make the final press your iron will move over the seam easier, without tugging or getting caught on the seam.
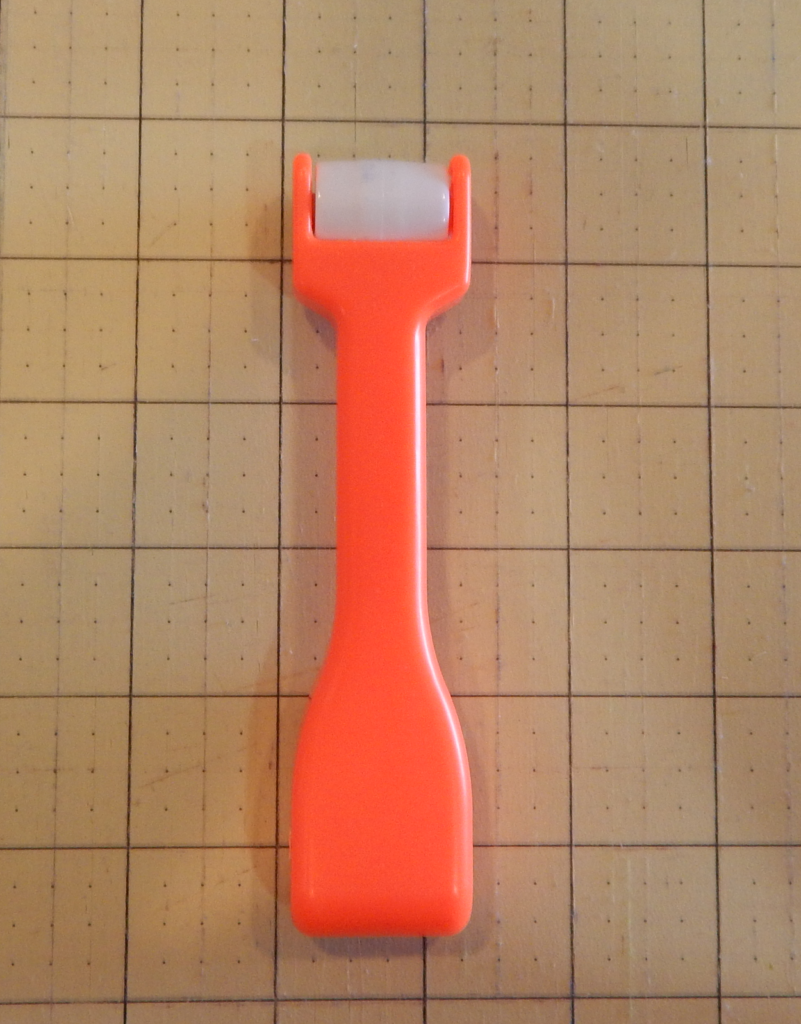
Now the tool- it’s all about the tools! Look at this little guy.

Instead of pressing with your fingers the roller on the end does a super- even better- job of flattening out the seam. The handle end also has curved edges for pressing. The tool is versatile to use many ways. Using the tool on a hard surface gives the best result.
I started doing this second step when a student mentioned she did it on a quilt block we were working on. The block had lots of seams along the bias. I started implementing this step on bias seams. A few months later I mentioned finger pressing to a friend during a sew day; next time I saw her she gave me the tool pictured above- thank you again, Charlene! When I have a lot of small pieces to press I use this tool at my ironing board. I set a small cutting mat on one end. As I set the seam I place the warm piece on the cutting mat and use the tool to finger press. Then I do the final press.
I’m making a Log Cabin Quilt right now. I love the simplicity of the block but to have a nice log cabin you still need a very straight accurate seam and you have to be careful with pressing. Even though you’ve sewn on the grain pressing the long seams can cause stretch and distort the block. Using this tool made such a difference! I finger- folded the seam and rolled over it perpendicular to the seam. Then I rolled over the seam again at a slight angle, as I ran my thumb nail along the seam just ahead of it. I wanted to be sure I had a nice tight fold. When I took that piece to the iron board the iron ran up over the top of the seam effortlessly. I now have perfectly pressed and very straight seamed log cabin blocks to sew together. (There’s a picture of the quilt top in next week’s post). I was so happy with the result this tool gave me- taking the extra time to do this step is worth it! Now on to step three- almost done!
STEP THREE. Final hot steam press. The prep we have done makes this step pretty quick and easy. You will press your piece again, flattening the seam to finish. Limit movement of the iron. I usually do this with the piece right side up.
A comment about pressing seams open. These are a little tricky- I’ve found the very tip of your iron is a good technique. After setting the seam I turn it wrong side up and finger press the seam open. I usually use my fingers. Then, using the tip of the iron and leading with my thumbnail to keep the seam open, press the seam. You will find that if you flatten the iron against the block as you press you will catch previously pressed seams and will have to go back and touch them up. Keeping your iron up on its point is best. Then I turn the block right side up, and press the seam again making sure it’s open.
So there you have it- part three of this series and you are now an expert presser! As always, any questions or comments- you can leave them below now- thank you, for that update, Bryne!
Until next week’s Series Post- find some time to sew!
Here is the link for the Clover Notions Press Perfect Roll & Press