Hello, Everyone!
Today I’d like to share a special quilt, one I made for a friend (with a famous past on my website 😮 ). This quilt was a gift for her sister and the really great thing about it- she did the long-arming.
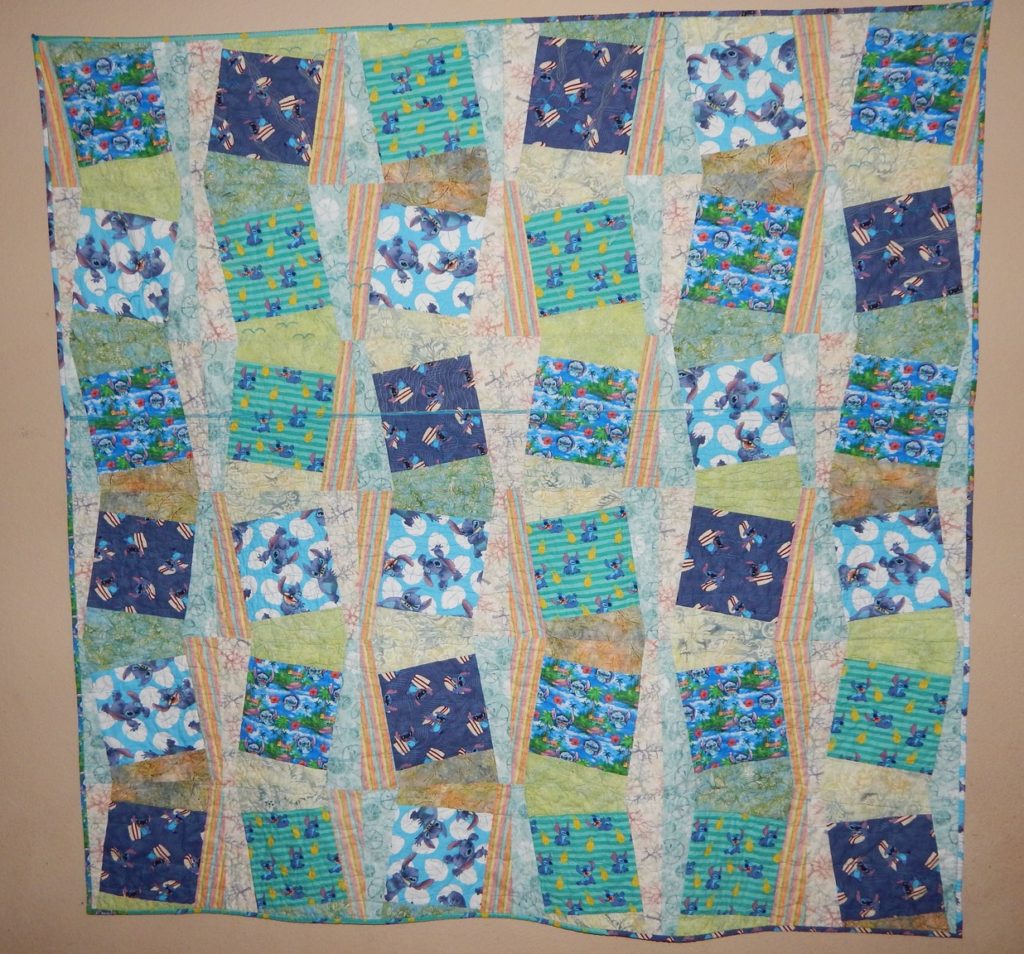
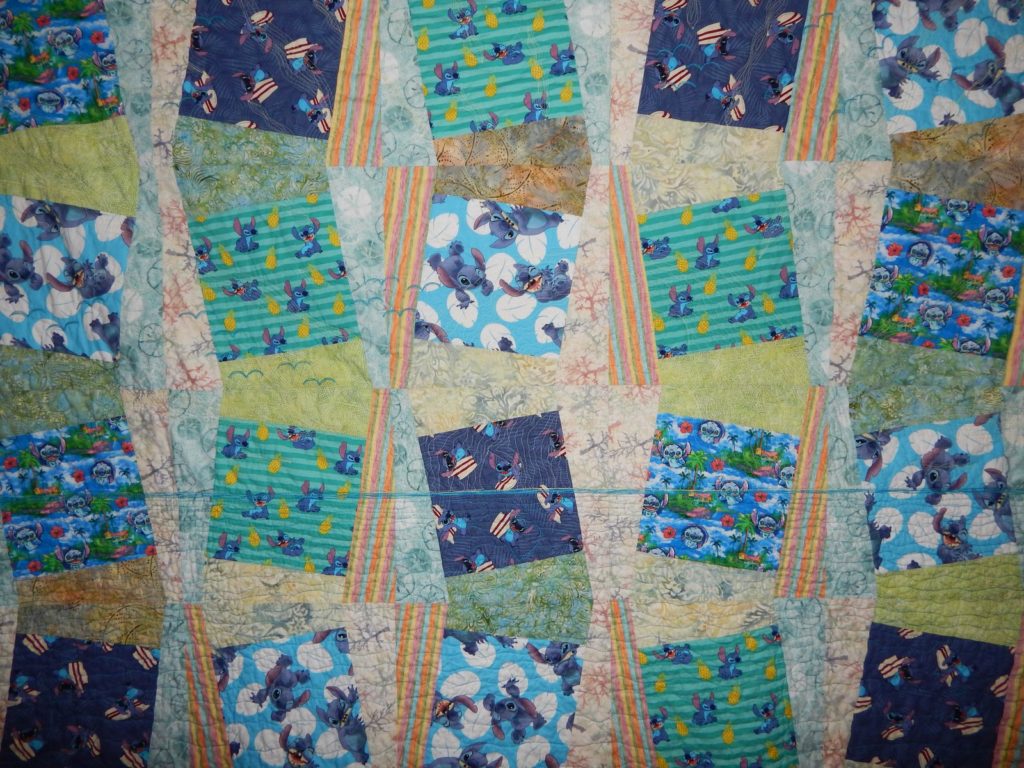
If you look back to my May 3, 2020 blog- Custom Made Friends Quilt- you will meet Miss Alyssa. This past September Alyssa asked me if we could make a quilt for her younger sister. Alyssa had a theme idea of Lilo and Stitch; Stitch is her sister’s favorite Disney character. The quilt will live in a room with beach/ ocean decor so the Hawaiian aspect of the characters was perfect. We decided to make it a little smaller than queen size; this quilt finished at about 73” square.
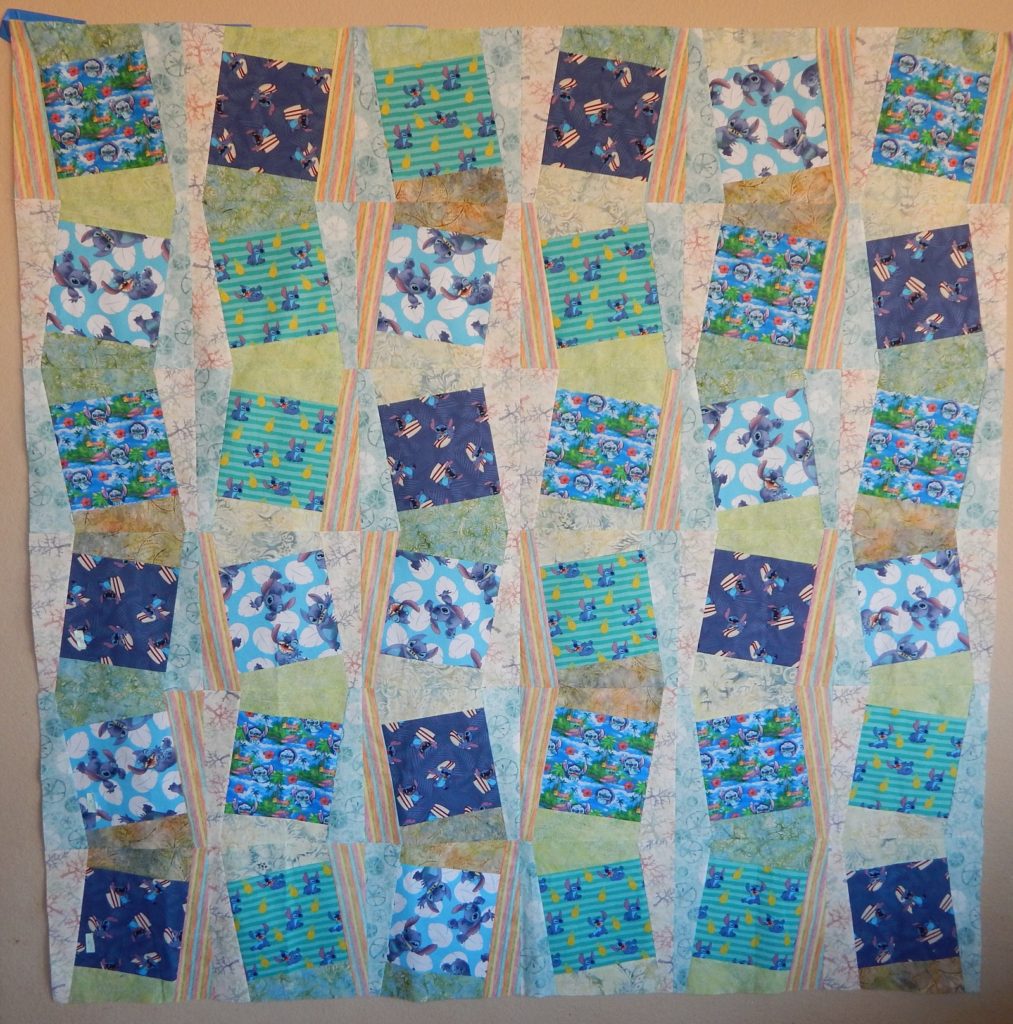
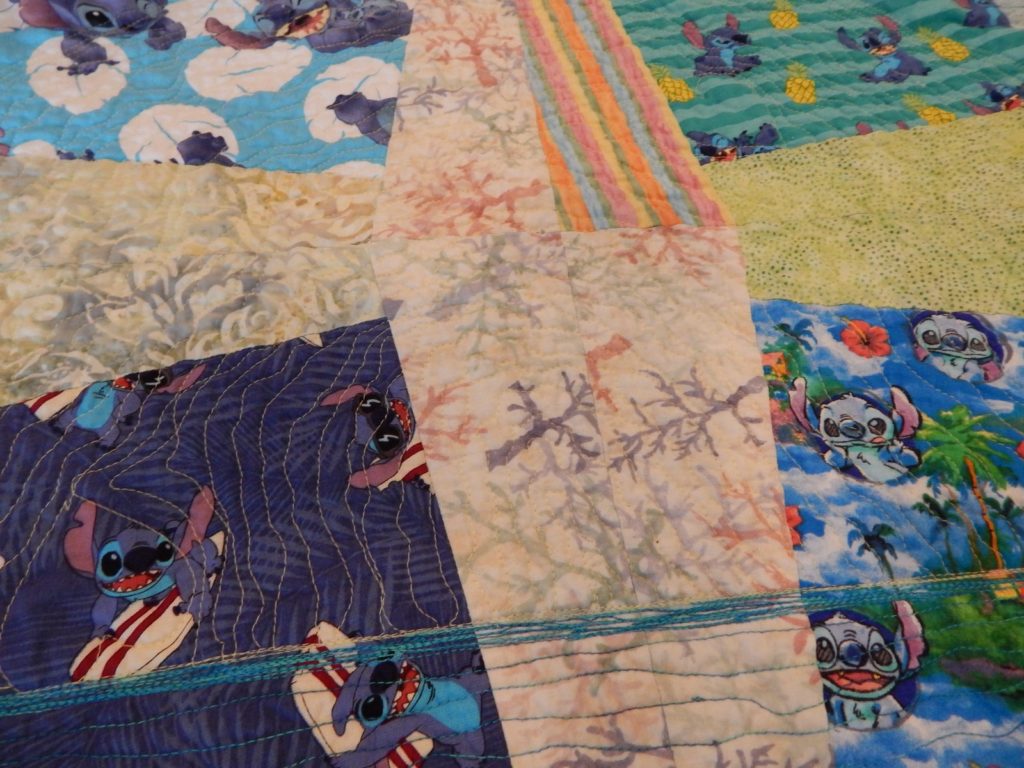
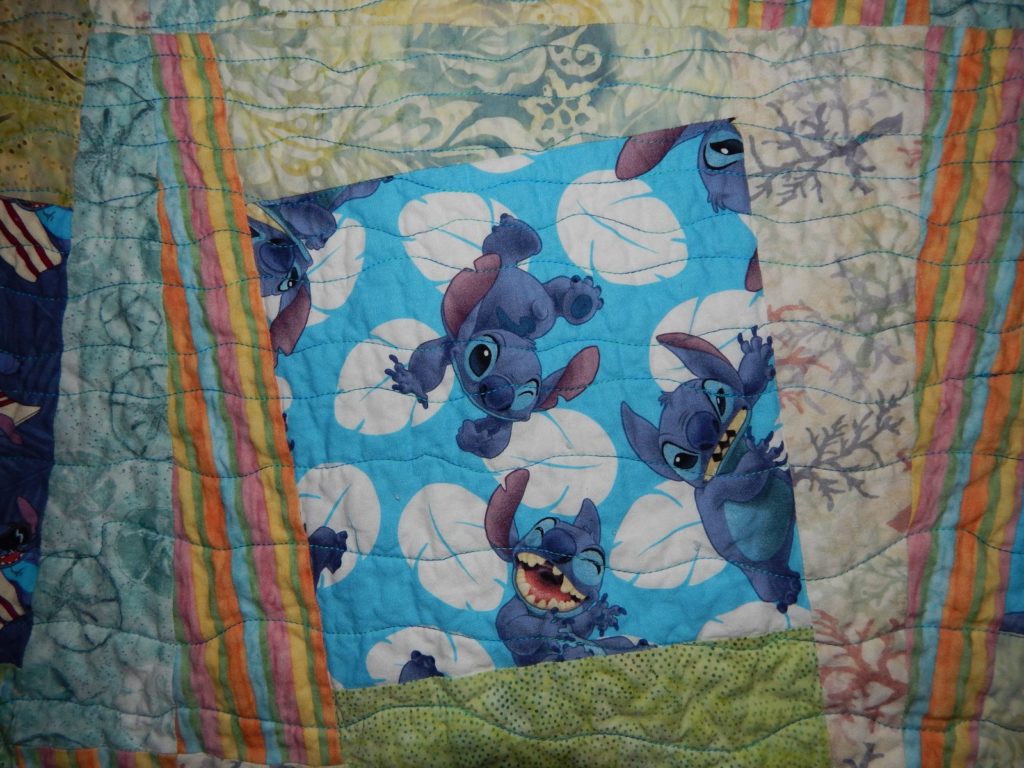
I saw a picture of a quilt with the same basic design idea I used here. I started with a 8” square of our Stitch and Lilo fabrics (we used four different patterns). I had a stash of Hawaiian style fabrics in my stash; I cut strips and framed the focal fabrics. I decided to sew the top and bottom strip on first, then the side strips. I decided to go completely scrappy/random with the framing process. I made about 12 blocks, laid them together and had to rethink. I was having trouble laying the squares together so they harmonized.
The solution, and it worked out well, was to lay the rows out and design them as I went. I laid out one row of focal squares and then laid strips out. I took the blocks to the sewing machine one by one, sewed, pressed, and returned them to my design area (the kitchen island).
I do apologize for not having any pictures of the construction process. I plead temporary quilting insanity…
I want to comment on the “tipped” blocks and how I got there. I must say, I winged it as I went. I made two prototypes of this block to experiment with so I would have the plan before I trimmed my quilt blocks. I used my 12 ½” square ruler and laid it on top the block, tipped it each way and figured out the marks on the ruler where the block edges had to lay. I marked the ruler with blue painters tape (any colored tape or post it note pieces work); I made marks where the corners of the block would be, tipped both left and right. If memory serves I think the center square was tipped about 10 degrees.
Here is a picture of the quilt top.
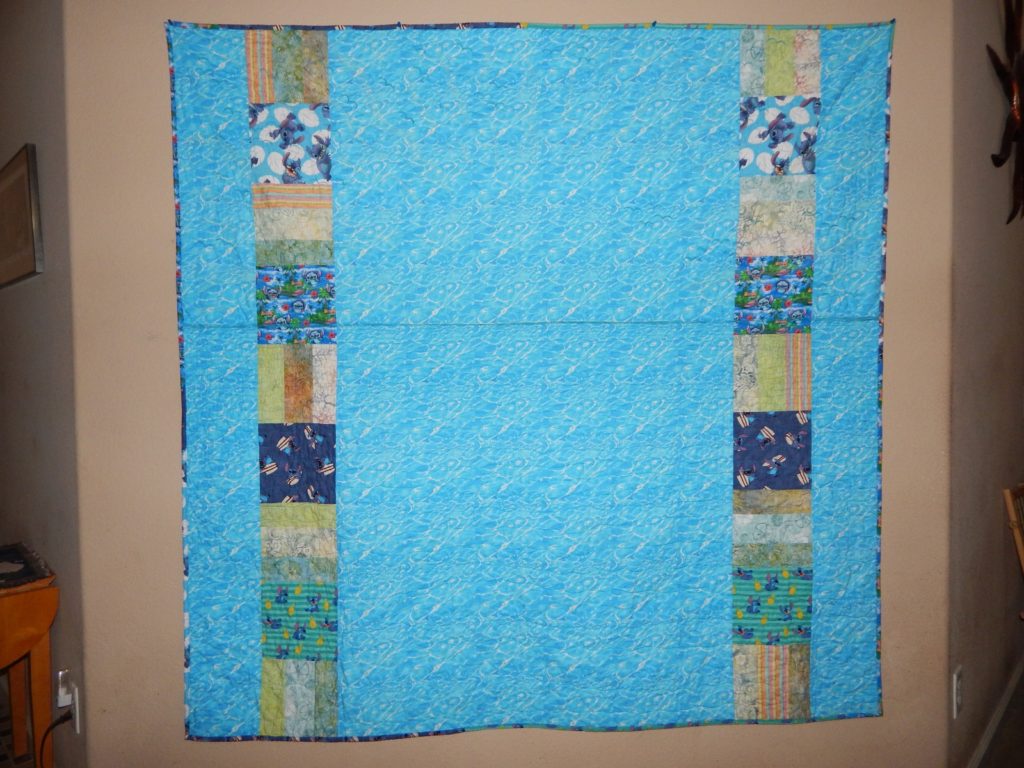
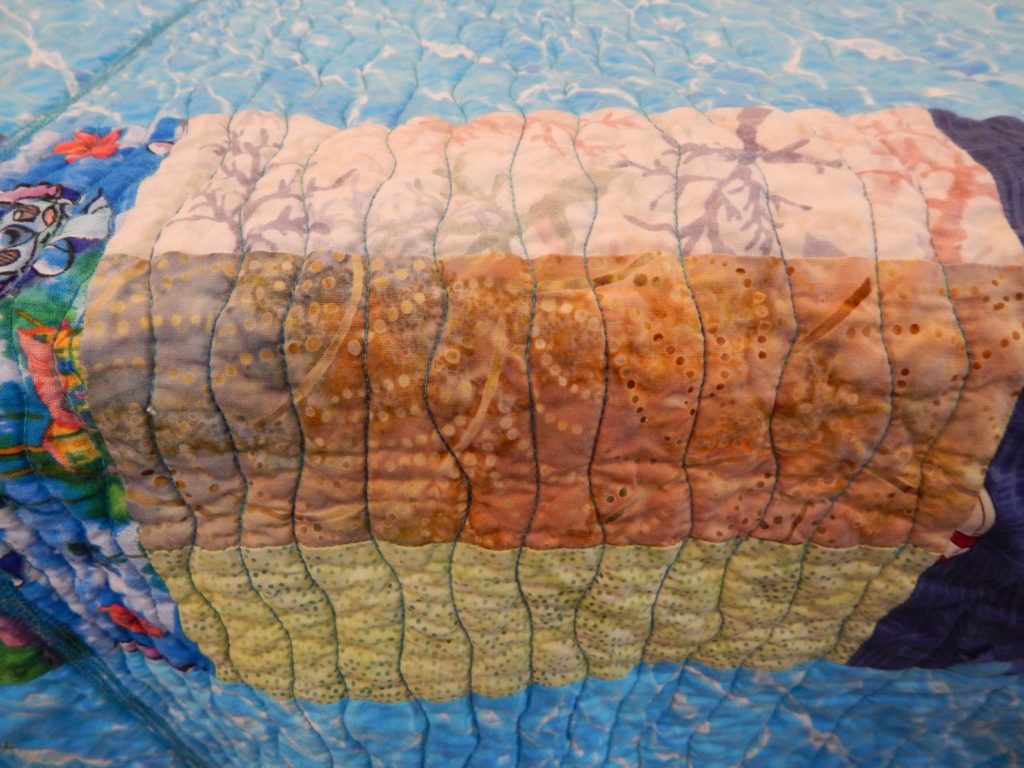
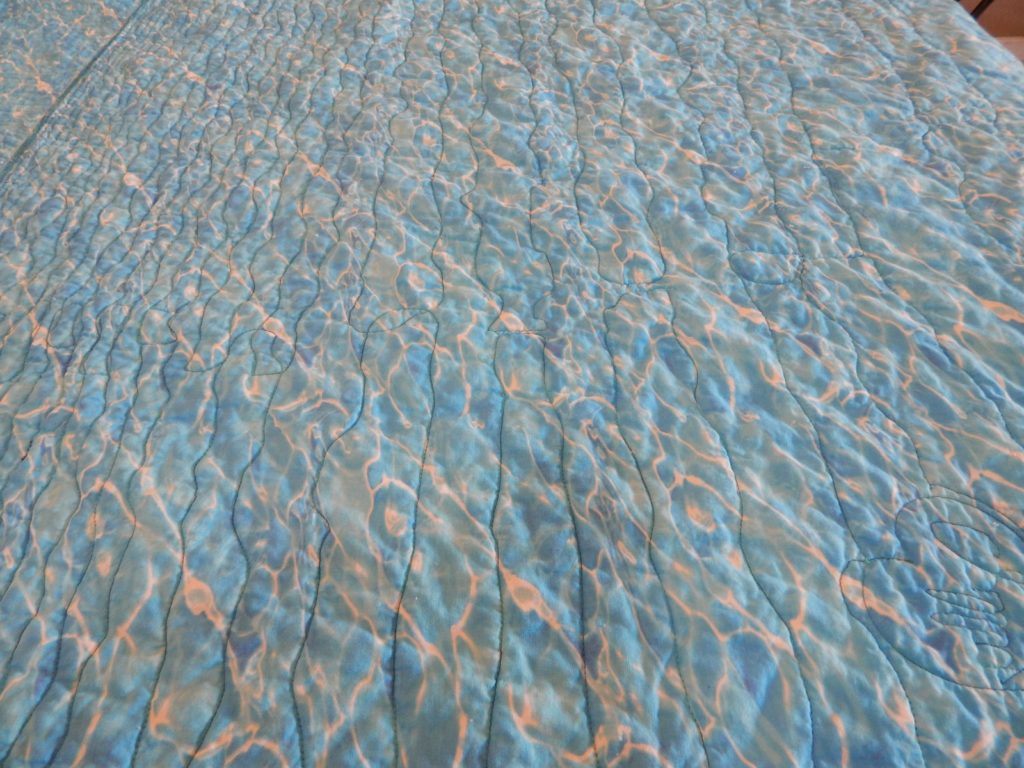
I had some extra focal fabric. We were not going to make pillows; I wanted to use the fabric knowing a second project with this was unlikely and I didn’t want it taking up storage room. I had some water fabric Alyssa loved for the backing but was a little short on the yardage. I decided to make an after quilt (a quilt for the back) with the remaining fabric. It worked out perfectly; I used everything I had of the water fabric and made two rows of blocks from all the other fabrics. The other plus to the back is it showcases the quilting- we’ll talk about the next.
Here’s a picture of the back.
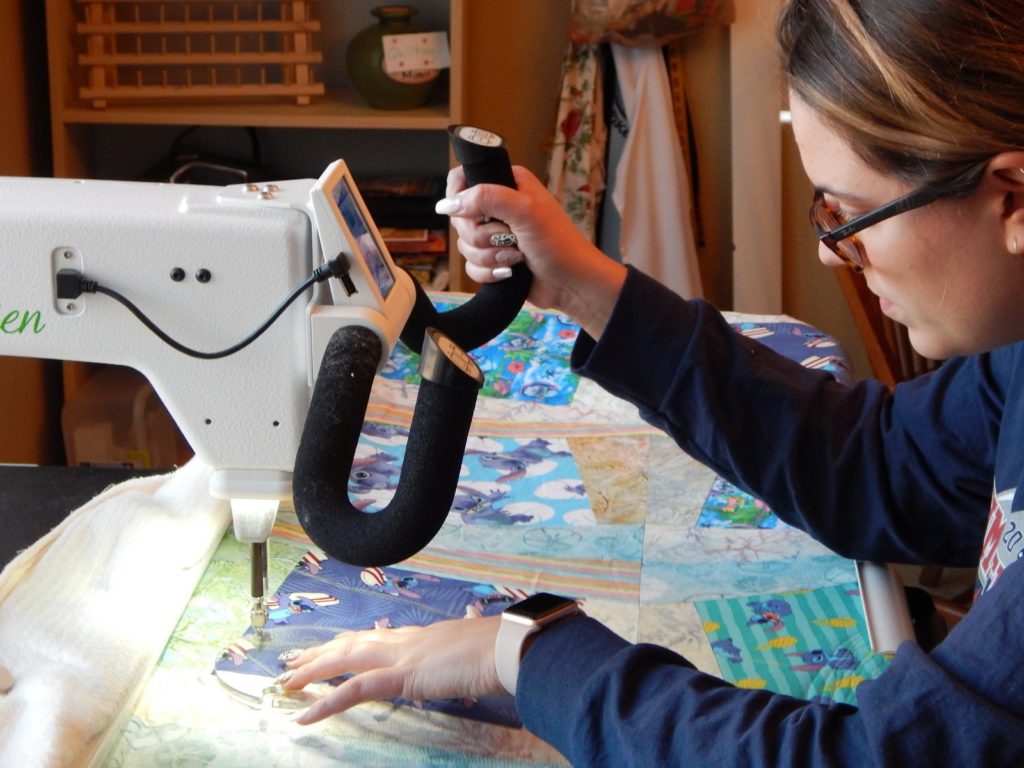
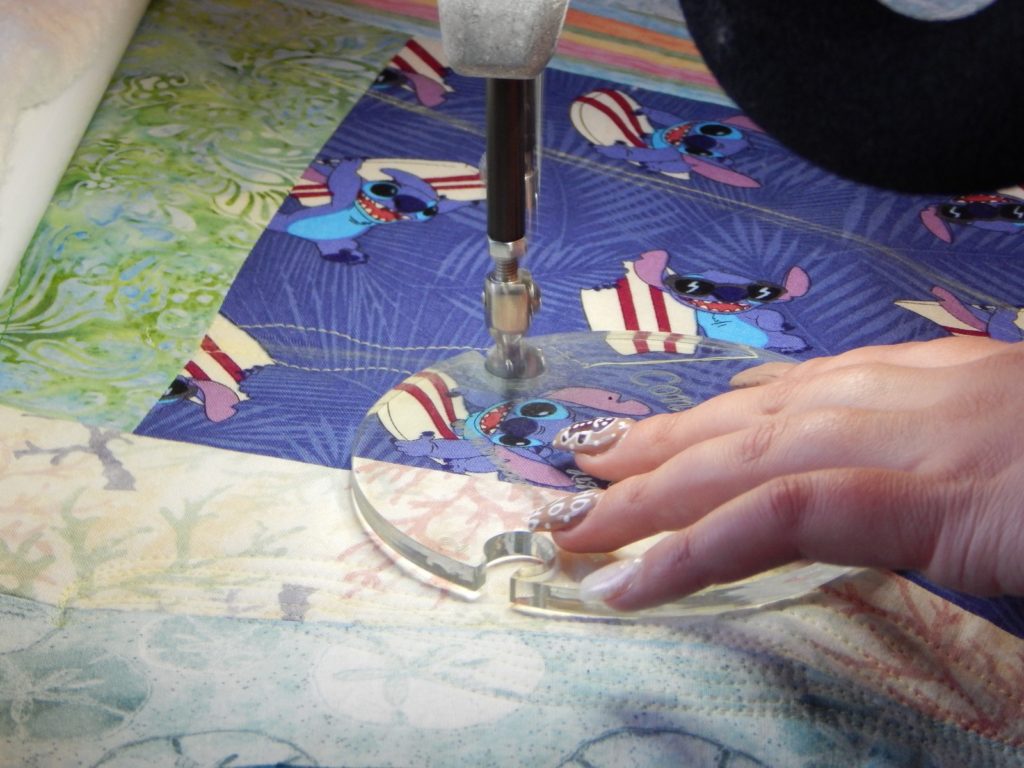
Now we get to the fun part, the quilting. At the beginning of the project I asked Alyssa if she wanted to longarm the quilt. I thought it would be so cool if Alyssa had a hand in the creation of the quilt. Alyssa said yes, she’d try. While I was constructing the quilt top we spoke about quilting ideas; I wanted her to get her creative mind simmering for ideas. I suggested some too.
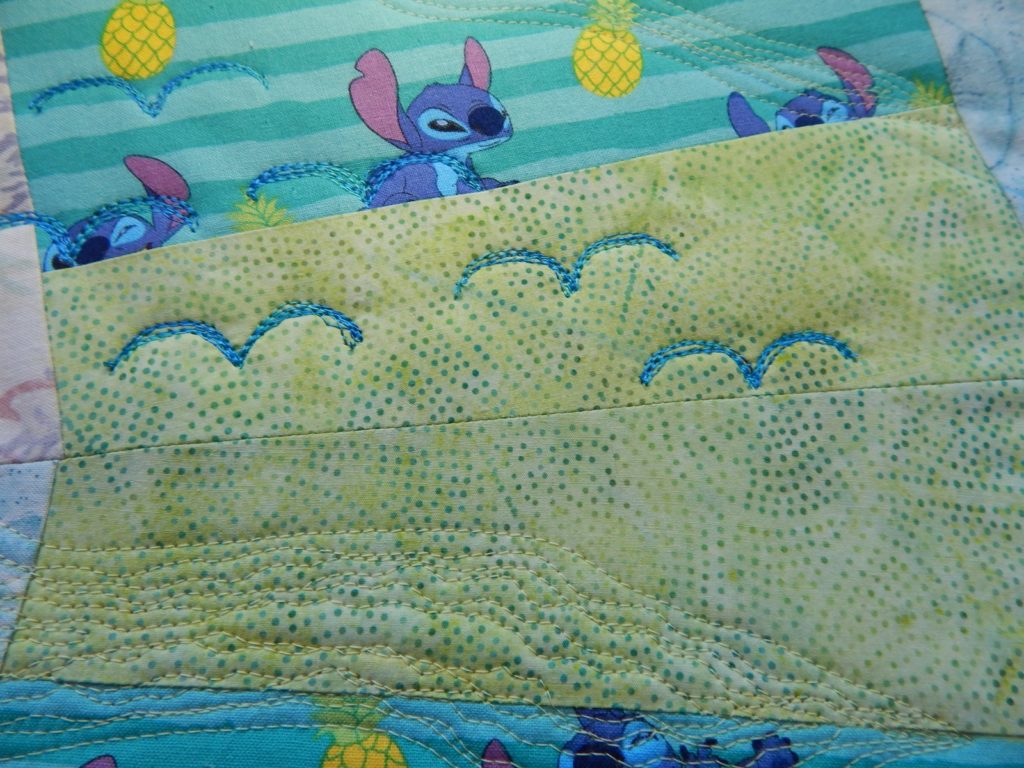
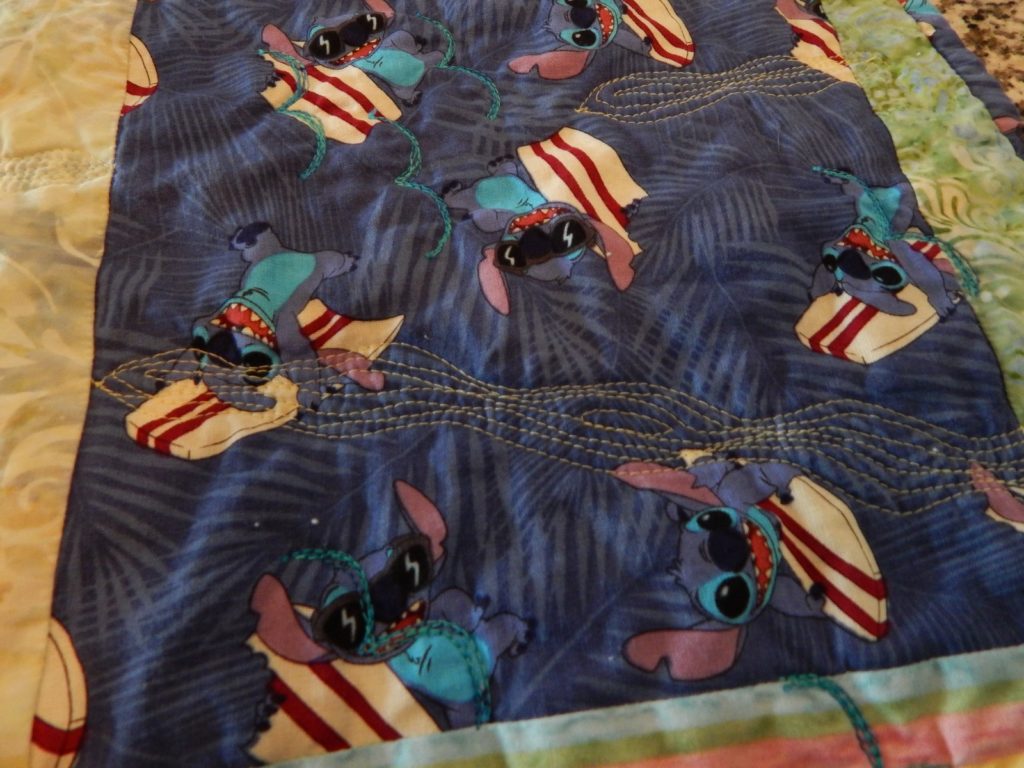
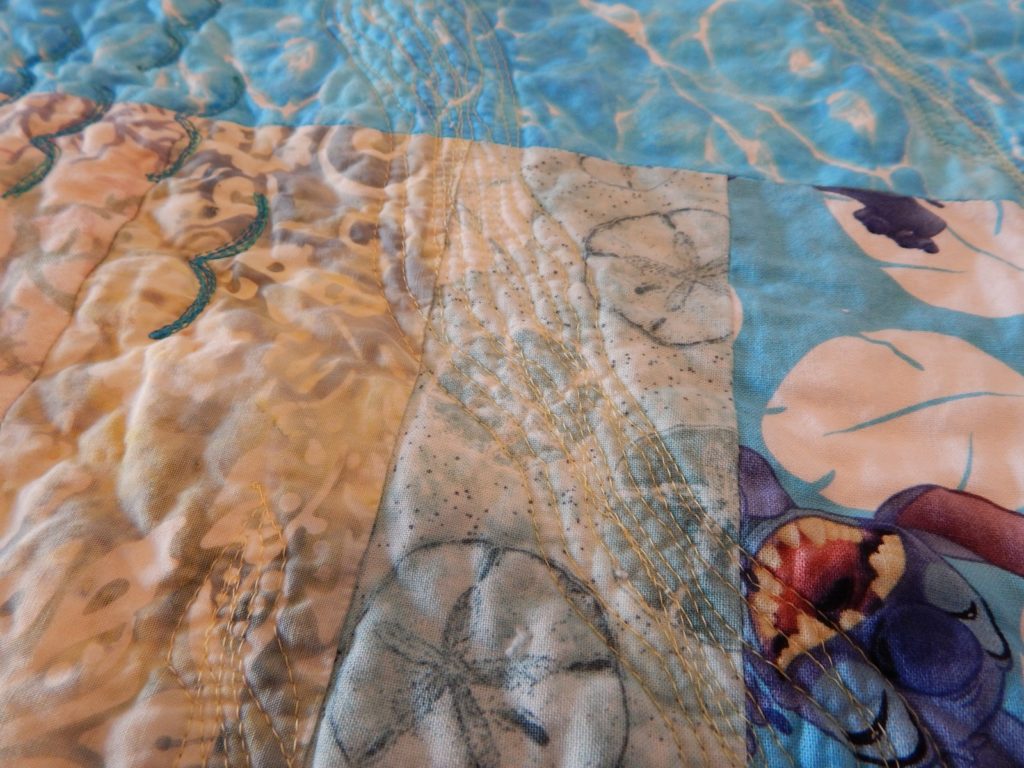
A little to my surprise, Alyssa settled on a landscape, tapestry style plan for the quilting. Going with the theme of the quilt, we did a sunset, birds, a defined horizon and water ripples. For the water ripples we tried to create depth by graduating their closeness and I think we were successful!
Alyssa chose a pale yellow 50 wt. thread for the sun and a variegated dark to medium blue/turquoise shades 40 wt. thread
We taped wrapping paper together to get a 73″ square- the size of our quilt. On the wrong side of the paper, we sketched out our design. We wanted to be sure everything was in proportion and looked good. We planned out how the water ripples would graduate wider. We marked the quilt as needed with chalk and loaded it on the longarm. Please enjoy the pictures.
thread detail
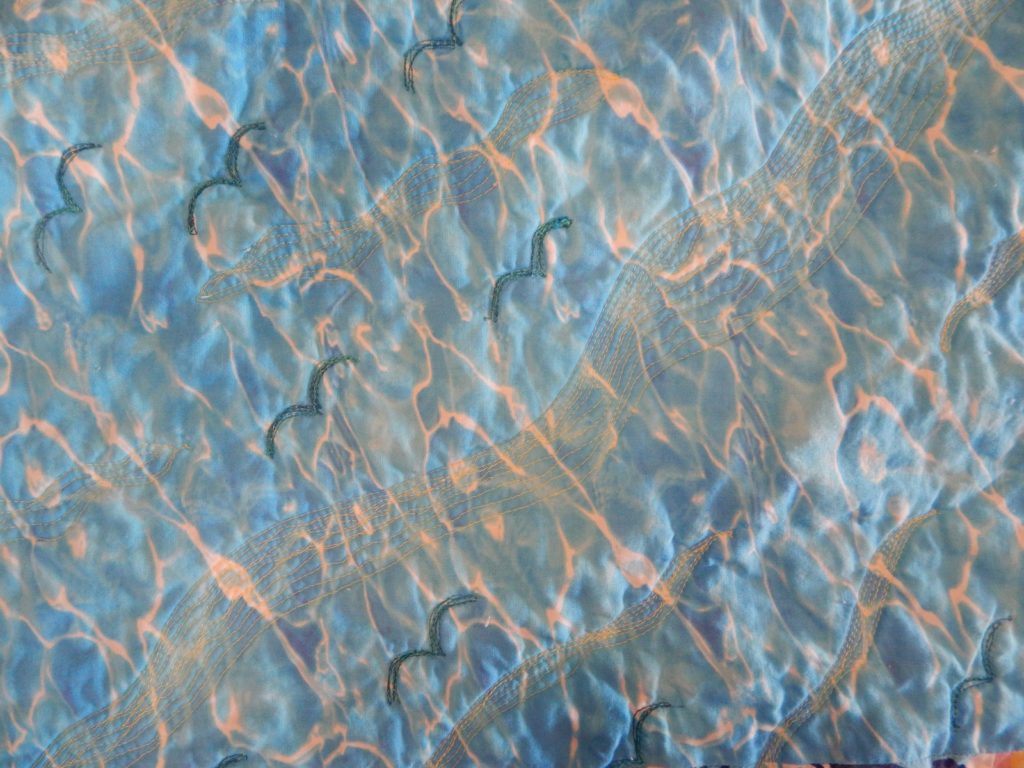

Alyssa had so much fun with this quilt! Even more, she did such an amazing job! I think the quilting turned out so nice! Here are a few pictures of the finished quilt.

I got it done for Christmas- delivered it to Alyssa on Christmas Eve morning. Alyssa’s sister is enjoying a quilt her sister had a big part in. Being a part of it was a pleasure and a heart-warming experience.
I’m happy to report this isn’t the last time you’ll be seeing Miss Alyssa. I just started a quilt for her Mom and she will longarm this quilt too. The story continues…
Until next time, find some time to sew!